R1200GS DIY mudflap & side panels
R1200GS Battery tray, rear shock and rider protection DIY style
Author: ‘Colin O’ ukGSer.com 26/11/2004
View thread for additional comments:
Rear flap & side panels DIY instructions (external link)
This is how to make and fit a rear flap to protect the battery and back of the engine area and side panels for under the seat to prevent road spray reaching the rider.
I fitted this mudflap as a temporary measure while I was waiting for the Motorrad Concepts hugger. Now production of the hugger has stopped the flap will have to stay for a while longer!

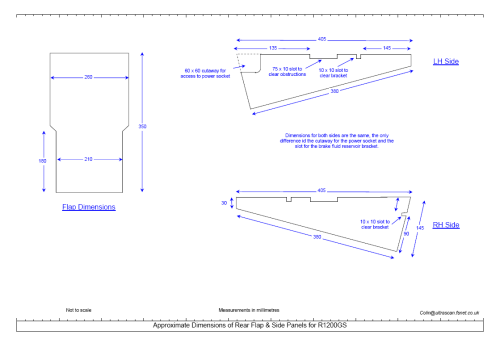
Above is a shot from the rear of the bike showing the added mudflap. The dimensions and sketch for the pieces are shown in a separate drawing below (right click the image and select Save target As to download a larger version).
The flap is attached to the toolbox tray as shown below.
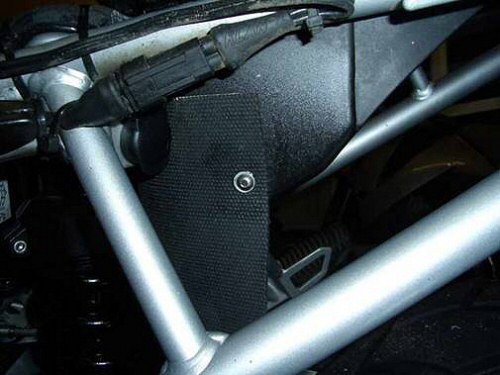
On the RH side a slot has to be cut to accommodate the bracket. (Here the brake fluid reservoir has been moved out of the way.) The rubber used was given to me by a friend, I understand it is rubber belting which is used on conveyor lines, but maybe cheap rubber car mats would do the job.

The flap has cut the amount of spray by about 90%. The next step is to fill in the gaps under the seat, the photo below shows cardboard template in place.

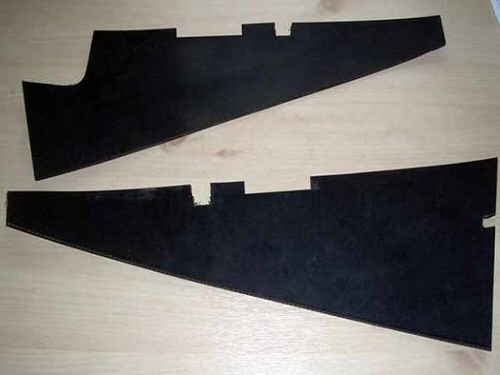
And below are the two side fill in pieces ready to fit. Cut outs are needed to access the 12v accessory power socket and clear various obstructions.
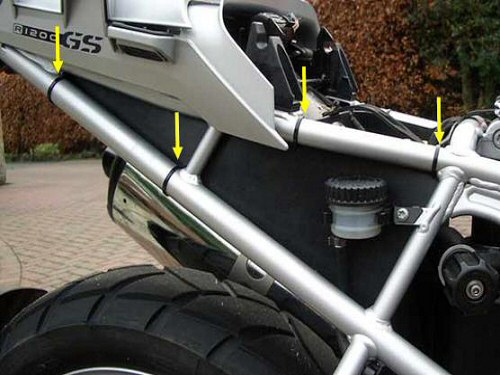
Here is the view from underneath with the panels attached with cable ties.

And a shot of the other side.

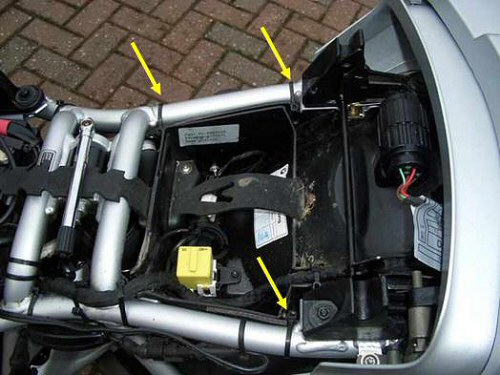
The view from above, cable ties arrowed. The rubber can just be seen sandwiched between the toolbox and frame. Following are some more shots showing the fitting method / cable tie attachments…

Job finished!
And the purpose of the exercise…….to keep the bike (particularly the rear shock absorber and battery area) and rider a little cleaner! 🙂
