BMW R1200GSA Wilbers Rear Shock installation
See also: Front shock installation instructions here
BMW R1200GS suspension / shocks / shock absorbers / struts
This article refers to Wilbers shocks easily applies to Ohlins, WP, HyperPro, Hagon etc aftermarket suspension.
| AndyW – usual warning, refer to the BMW workshop manual. Torque values |
BMW R1200GSA Wilbers Rear Shock installation
Author: ‘cookie’ ukGSer.com 20/03/2007
View thread for additional comments:
Fitting wilburs to a GSA (external link) (wilburs = wilbers;-)
This is the promised thread on how I fitted my shiny new Wilbers shocks to my BMW 1200GSA. Hopefully I can point out some of the pitfalls that I found. I think I avoided most of them.
Tools – usual selection of spanners, socket set, screw drivers plus the following Torx bits: T20, 25, 30, 45, 50 all get used and are essential.
**********************************************************
Read this whole article before starting if you’re choosing to use this as a guide. It is just a guide. It’s not the 10 commandments. It’s not “the right way to do it”, it’s a record of the way I (cookie) did it.
A good look at the “disclaimer” might be a good idea at this stage too
**********************************************************
Note: the bike is in “winter trim” i.e. covered in ACF50 then ignored, so is a tad grubby. never mind, makes the shiny blue shocks stand out more!
REAR SHOCK
1) Remove pannier rails
The left hand pannier rail needs to be removed, if fitted, or the silencer gets scraped as it comes off.

Remove the larger torx bolts from the main fixing point

Take the loose M6 bolt out from the back of the pannier mount/crosspiece.
Then this one. There’s a spacer behind it so make sure you take it out before it falls out later and gets lost.

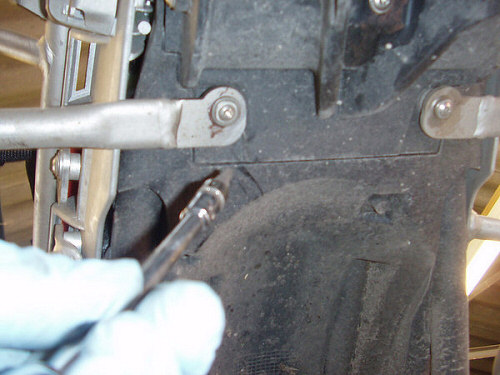
Undo this screw and collect the spacer behind it – remove left hand pannier mount.

2) Remove silencer
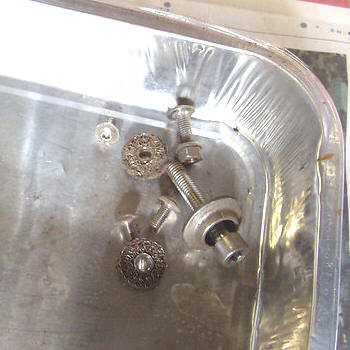
I took the heat shield off, but looking at it now, that might not be necessary. You may want to take the opportunity to clean behind it. If you do, look out for the odd wire mesh spacers that fall out.


These fit on the 2 forward screws, which are longer than the screw at the back. Loosen the big silencer clamp bolt where it fits to the cat (catalytic converter), then take out the silencer mount bolt where it attaches to the frame. Wiggle the can forward/back a few times whilst twisting a little and it will come free from the cat.
Undo the rear wheel bolts and remove wheel.

Jack up final drive.

Undo lower shock mount.


This is VERY well loctited in, my windy gun (air gun;-) would not move it, nor would the puny ratchet handle shown in the pic. Good sized breaker bar is what is needed.
It makes a horrible creaking and groaning as it comes free. Ignore, be brave, press on (or heat it….carefully!).
Undo top suspension mount and remove the old strut. Replace with your new Wilbers (or Ohlins, WP, HyperPro, Hagon etc) shock.
Slight problem
Wilbers fitting instructions show the remote preload adjuster fitted here.

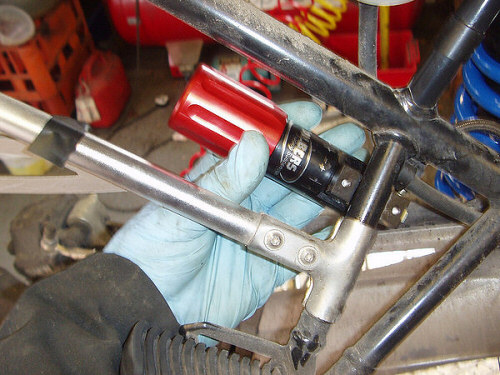
This is clearly not possible if you have BMW pannier frames fitted. I tried other places…this one

…but the access to the adjuster knob is very limited and I rather think the rear wheel might clout it. I nearly fitted it here, which is very neat

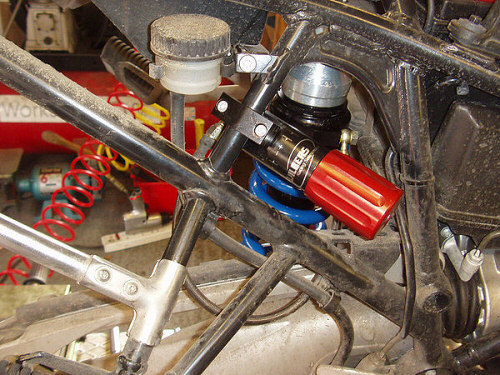
…but with the adjuster knob being inclined downward it would fill up with water. There are only a few positions possible due to the length of hose and its reluctance to twist so I finally settled on this location on the right hand pannier rail. (see later, alternative location)

…which is fairly neat and the hose is unstressed. Note how it goes through the gap in the frame tubes, that keeps it well out of the way of the paralever top strut. The hose needs zip tying to the footrest hanger.
Reassembly – reversal of taking it all apart! Follow the Wilbers (Ohlins, WP, HyperPro, Hagon etc) instructions for installation/adjustment and make sure you check the BMW Workshop manual re torque settings, application of thread lock etc….incorrectly installed suspension components could result in an accident/crash!!
Notes:
If you have to adjust the banjo bolts on the rear shock or remote preload…………. be careful how hard you tighten them! One of mine came loose while experimenting with position. I thought I was lucky not to lose any oil
RickA (ukGSer) – Things to Forget! (or not!)……just as I did the job except I managed without removing the pannier frame – just taped-up the bracket that could catch on the exhaust with gaffer tape before removing the pipe.
Blackal (ukGSer) – pay attention to this……………. If you re-orientate the hydraulic preload connection to the top of the shock – BE VERY CAREFUL HOW MUCH TORQUE YOU APPLY I bust the banjo bolt on mine and ……….
1) Banjo bolts in M8 x 1 are virtually impossible to source.
2) You need to have the shock preload section rebuilt and bled
The banjo only requires a tiny hole in it but they use a hi-flow bolt as if it is regularly passing large amounts of fluid, consequently – the bolt is weaker
Addendum
Bu ‘Thunder’ (ukGSer) 09/06/2007 – I’ve just fitted a set of the Wilbers to the GS and found the hydraulic pre-load adjuster will fit at the bottom of the pillion peg frame even with the pannier frames and still lets the panniers be fitted.


I have an R1200GS – I know this article relates to the GSA but I have GSA luggage and frames. If anyone is going with the option of high and low compression adjustment the hydraulic adjuster fits on the left side framework like so.

Front shock installation instructions here
Cookie’s Disclaimer
This is not what I’d call an easy job. Be sure you can do it and do it right. If you get it wrong, the mistake could kill you!! These are important components you need to mess with. IT HAS TO BE RIGHT.
Double check the torque values etc. I got mine from an out of date bmw cd rom, they may have been changed. If in doubt get someone qualified to do the job with/for you. This is not a guide as such, more a record of how I did the job on my bike. Maybe it will just tell you, that you don’t want to do it yourself.
Most importantly, if you do the job and it all goes tits up, it’s NOT MY FAULT. Best I can do is make an offer for some of the wreckage….maybe! :-0