BMW R1200GS to R1200GS Adventure Fuel Tank Conversion
If you live somewhere in the back of beyond or are planning to travel somewhere away from civilisation you may find the 20 liter fuel tank capacity of the R1200GS somewhat limiting. You can increase the capacity of the standard tank a little (approx 3 liters / 40 miles extra range) by making the fuel filler modification but that’s not a great improvement. A fuel capacity of 33 liters would be much better, achieved by swapping out the OE R1200GS fuel tank for one from a R1200GSA. The article below has been produced from a PDF document written by Dale Brown (26May2006) and reproduced here with his kind permission.
If you’re lucky you will find a second hand / used GSA fuel tank on eBay or from a motorcycle breakers.
Alternatives (much more expensive alternatives!) are the auxhiliary fuel tanks / fuel pods available from Touratech and Wunderlich – I added a few details and a couple of photos to the Featured Bikes article on JD’s 2005 R1200GS here.
The usual disclaimers and warnings apply!
BMW R1200GS to R1200GSA Tank Conversion by Dale Brown
Scope
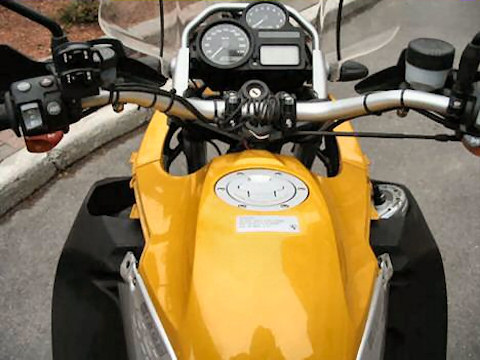
This document outlines the basic steps required to mount a first-generation R1200GS/Adventure gas tank, and required accessories, onto a first-generation R1200GS. This gains the standard R1200GS 13 litres of additional fuel capacity from 20 to 33 litres (4.4 to 7.3 gallons or 5.3 to 8.7 US gallons). The models specifically used in this document were a 2004 R1200GS motorcycle and a 2005 R1200GSA gas tank and accessories.
The total retail cost of this conversion was about us$1,200 not including about $80 for the BMW factory wrench, shipping & handling, and labour. Of course the stock 20L gas tank could probably be sold to reduce the overall cost somewhat. Adding an aux tank would be considerably cheaper, but adds some complexity, requires filling two tanks instead of one, reduces luggage capacity, and has a more adverse effect on centre of gravity.
Download the original PDF version of this document.
Accolades
A huge thank you to Frank (James Franklin), also known as LBZ-GS, at Hammersley BMW in North Carolina. Without his assistance, this project wouldn’t have been completed. Godspeed, Frank.
A big thank you to ADVRider.com members Gadget Boy, Prop, RC46, Opus, Moto One, zolman, Brad Vardy, Fugly and the ADVRider.com community. I hope I didn’t miss anyone, if I did it wasn’t intentional.
Tools Required
- BMW full tool kit, specifically the keys and screwdriver
- Shop paper towels or a clean cloths (hand towel sized)
- Disposable plastic tub approximately 1′ X 1′ minimum
- Nuts and bolts magnetic tray
- Workshop stool (treat yourself with one like this)
- Large plastic sheet
- BMW Factory Wrench
- A quality ratchet set
- A ratchet wrench extension that fits into the BMW factory wrench
- A torque wrench (see Step 5 of tank installation for rating) (must be capable of more than 25nM. This one is a good bet.)
Tank Removal
Note: left side and right side are determined from the rider’s point of view.
- Drain the tank or run your tank down to a reading of 5 miles/kilometres left.
- Place the bike on the centre stand.
- Remove the passenger seat.
- Remove the rider seat.
- Remove the right and left side cover.
- Remove the large side panels with the BMW logo (grey or black).
- Quarter turn the quick action adapters/faux Dzuz fasteners at the rear of the panel, nearest the rider.
- Quarter turn the flat sided/open threaded fastener at the bottom of the panel, at the front of the bike, on the inside, nearly parallel with the front forks.
- Directly above the flat-sided fastener is the final connections, a retainer set up, gently wiggle it out to free the panel.
- Store them away; you won’t need them again .
- Remove the beak — there are two bolts below and in front of the windscreen and two joining it to the centre tank panel.
- Remove the left and right fairing screws attaching the silver panels to the bike.
- There are six connections to the fuel tank rings (white covers covered by metal ring on either side, one vertical the other horizontal). Have the paper towel or clean cloth on hand to catch the excess gasoline.
- The two identical lines are the fuel return line on the left side and the fuel delivery line on the right side. These are removed by depressing the metal tab and popping off the line, have the towel ready to catch the excess gasoline.
- On the left side there are two electrical plug connections for the fuel pump, they can be removed by inserting your thumbnail or screwdriver into the gap behind the connections, toward the interior of the bike. Carefully remove them from their positions.
- On the right side there are two rubber lines — a fuel-tank ventilation line and a fuel overflow line. You can note which line is which, but if you follow their lead down to the bottom of the bike, you will see that they are emptying to the same place — the ground. Not environmental IMO. Tut, tut, BMW. To remove these gently put the flat head of the screwdriver at the mouth of the lines and gently press them out and up from their connection and they will slide up and away. Note: Motorcycles with the charcoal canister, follow the factory manual.
- Remove the two bolts at the bottom centre of each side of the tank. The tank should lift up and away from the bike easily.
- Remove the left and right tank panels.
- Removing the fuel tank cap should be done with care to avoid dropping parts, however you can easily get to them if you do. There are three rubber buffers which will try to dive for the gas tank fill opening the minute you pop off the centre tank panel so make sure you grab them. This is more of an issue when mounting the new tank than removing the old one.
- Once the fuel tank cap is removed place it in the rubber tub and keep it clean and dust/dirt free.
- Whether or not there is gas in the tank will determine which one of the fuel pumps you remove first. If empty start on either side. If any gas, start with the fuel pump on the left side.
- Utilizing the BMW fuel tank ring wrench, ratcheting wrench and extension that can fit in the square slot of the ring wrench, remove the union nut, or metal ring.
- Have the tub on hand and slowly remove the fuel pump, ensuring it doesn’t snag on the suck fuel pump line that sits on that side. You will have to pull the float in a bit to get it clear of the portal.
- If you still have fuel in the tank it is easier to drain at this time. Clean it completely of fuel and wrap for storage.
- Remove the union nut or metal ring, on the suck fuel pump, right hand side.
- Label the hose clips, and their position on the flange. Open the hose clips, disconnect the hoses and unclip the sucking fuel pump. Remove, clean, and store the sucking fuel pump.
- Remove the fuel tank cap, bronze mount and the lines from the sucking fuel pump.
Tank Installation
- With the bike stripped this would be a good time to do a general inspection of the fuel lines, fuel and water excess overflow lines and the general condition of the bike. Make sure the routings of all lines are secure and that nothing has been unhinged. Replacement of the air filter, front shocks etc. could be done at this time.
- Clean all areas with an appropriate cleanser and ensure that everything is up to par.
- Position the two fuel lines, two electrical wires and two fuel excess lines, dead centre. When mounting the new tank this is the best position to have them in. You splay them out from here towards their appropriate positions and nothing gets snagged or pinched.

- Take the fuel tank gas cap mount and feed it into the centre position. Feed the lines through to the left orifice. Line up the excess fuel lines in their original positions and retighten the fasteners. If the fasteners are damaged, replace them. Doing the suck fuel pump (left hand side) first will allow for proper routing of the suck fuel pump fuel line over to, and below, the fuel pump (right hand) side section of the gas tank. Note: Replacement of the rubber gaskets, and o-ring, is recommended. The gaskets are the 1st items to wear and if a leak is to occur it will be because of these.

- Feed the suck fuel pump line into and through to the fuel pump on the left side, of the tank. Ensure it is sitting at the lowest portion of the left side of the tank, and against the sides of the left tank to ensure it does not interfere with the fuel pump. Attach the Adventure suck fuel pump to the flange. Make sure you hear an audible ‘click’ when attaching it to the flange. Looking at the picture below you can see a white pin sticking out of the black square attachment next to the excess fuel vent lines. That must be locked in place or it could come apart inside. It’s a tight fit and requires a bit of muscle to make sure it is on properly. Again an audible ‘click’ will signal proper fitment. The key now is to get a good seat. Make sure the gasket wide-mouth end is at the top against the flange. Make sure the gasket is high and seated properly against the top of the flange. Put the entire assembly into the tank, levelling it. Do not force it down since this will damage the gasket. Take the union nut, metal ring and place it level on top of the flange. Slowly and evenly screw it on by hand until it is hand tight. Make sure it is an even seal. Torque to 35 nm. Once fitted ensure that the suck fuel pump line on the left side is low and against the wall, clear of where the fuel pump will sit. Note: Newton metre (nm) conversion table: Units of Force and Pressure Multiply by Newton metres (nm) To pound inches (lbf.in.) 8.851 Newton metres (nm) To pounds feet (lbf.ft.) 0.738


Note: This picture was taken with the original pump to show the attachment only,
the routing of the suck fuel pump line, in black, is different with the new pump
but the mounting is the same.
- Some have found reversing the fuel cap at this time beneficial when filling up. Replace the centre panel and the fuel tank gas cap with care; you can easily get drop parts. There are three rubber buffers which will try to dive for the gas tank fill opening the minute you pop off the centre tank panel so make sure you grab them. Do this before installing the fuel pump on the left side so when — not if — you do drop any parts into the tank you can easily get to them from that opening.
- Inserting the fuel pump assembly is the same as the suck fuel pump assembly. The key again is to get a good seat. Replace the gasket. Make sure the wide-mouth end of the gasket is high and seated properly against the top of the flange. Put the entire assembly into the tank, levelling it. Do not force it down since this will damage the gasket. Take the union nut, metal ring, and place it level on top of the flange. Slowly and evenly screw it on until it is hand tight. Make sure it is an even seal. Torque to 35 nm. Note: This is optional but time saving. Add an amount of fuel through the fuel cap, something significant but nothing that will make lifting the tank difficult. A few litres or a gallon of gas will do. Close the gas cap. Empty the plastic tub of any parts. Lean the tank over onto one side, over the tub, to see if there are any leaks. It’s preferable to leave it there for some time with all the gas settled completely on the assembly. No leaks indicate you have a good seat. If a leak is present, reseat and try again. If torqued to the correct amount, re-torquing it could potentially damage the gasket. Remove, replace, and try it again. Repeat this test process for both sides.
- Once you’ve confirmed there are no leaks, prep the bike for receipt of the new tank. Clean all the lines of any dirt or grit. Place all lines (two fuel lines, two excess fuel vent lines, and two electrical connectors for the fuel pump) toward the front and centre of the bike. You want to ensure that none of the lines are stressed or damaged before continuing. Make sure that nothing is pinched or tweaked in any way to hinder the flow of fuel.

- Installation of the tank requires you to be wary of the two things:
- The air snorkel
- The throttle cable
The air snorkel sits on the right hand side. There is one mount that can be stressed or cracked when putting the tank into place on the bike. The tank requires you to lift it from the centre rear part and ease it down and forward onto its mounts. Again be wary of the snorkel mount. The picture below shows the tank properly mounted with the air snorkel in view (the darker piece, bottom right, with the mount in clear view that could be stressed or broken if installed improperly).

The throttle cable runs across the front of the triple clamp (handle bar area) and down along the fuel pump, left side, of the bike. The easy way to find it is to look for the Vehicle Identification Number (VIN) plate on the left side just above the left cylinder head. The first two pictures show what the throttle cable could look like after removing the old tank and/or installing the one.


This is what it should look like. Pull the line and cover to the rear and into place as shown below.

- Once the tank is in position, line it up to the mounting points. The 12GS tank uses two bolts at the bottom of each side, the Adventure tank has four bolts — two in the original locations and two at the front.

- The following pictures will give an idea of what the tank looks like reconnected and mounted. Mounting the tank requires a bit of manoeuvring; remember rear end up and forward. Attach fuel lines, excess gas lines, and electrical connectors. Check the throttle cable to ensure it is in the correct position. Check the air snorkel for stress. Line it up and loosely bolt it into place. Don’t secure until attachment of all lines are made. The rubber mounts, shown below, at the front per side are easier to mount once the tank is in position.


- Re-attach all trim panels.

- Line up the new side panels. Mount the BMW logos into place. Press firmly and leave overnight in a warm dry place to ensure adhesive integrity.


- Mount the rubber pad on the back on the trim panel. When mounted, look for the section where it is closest to the gas tank. Remove the backing and apply. This doesn’t have to be exact since I find the panel really doesn’t touch the tank too often.

- Attach the side panel mounts for the front lower section.


- Make sure to recheck all connections, bolts, and fuel lines, do a short test run to verify smooth running and your project is complete. Enjoy.
Appendix – BMW Parts Description and Part Numbers
| Fuel tank ring wrench | 161021 |
| Fuel tank | 16-11-7-676-458 |
| Side Panel | 46-63-7-694-967 |
| Side Panel | 46-63-7-694-968 |
| BMW decal (2) | 51-14-2-291-869 |
| Bracket | 46-63-7-673-255 |
| Bracket | 46-63-7-673-256 |
| Adventure right side cover | 46-63-7-699-717 |
| Adventure Sucking Pump | 16-11-7-694-106 |
| Bolt (2) | 06-32-7-651-211 |
| It’s recommended that all gaskets/o-rings be changed. It’s a small price to pay for insurance against leaks: | |
| Gasket | 16-11-7-677-883 |
| Fuel Filler Gasket | 16-11-7-654-903 |
| O-ring | 16-141-183-543 |
| There are assorted bolts for the trim panels labelled below: | |
| Screw M5X1 (2) | 06-32-7-651-212 |
| Screw M5X2 | 06-32-7-657-966 |
| Screw (2) | 07-11-9-905-650 |
| Rubber (2) | 46-63-7-700-744 |
| Rubber Mount (2) | 16-11-7-694-114 |
| Nut (3) | 46-63-7-658-638 |
Notes:
- Bracketed numbers indicate a quantity greater than one (1).
- The list is as complete as possible, I’ve arranged the parts as I see them fitting on the bike. Some parts came without the part numbers attached, specifically the nuts and bolts so some improvisation and guesswork was done in arranging their place in the above guide.
- “One other part you might add is the rear tank bolt metal washer, don’t know how you did yours but. On the brake side you don’t need the bracket that attaches to the rear tank-mounting bolt. I just cut off the bracket part and used the washer, but if you had an additional rear washer from the other side you could save the bracket in case you ever wanted to convert back.”
Opus (ADVRider)
Grinding a soft point (45deg) on the rear mounting bolts (x2) will make them a lot easier to finagle into position – otherwise these bolts can be a PITA, especially if you strip the end while trying – a small piece of wood temporarily placed on top of the airbox and under the rear of the tank will help line it up too.
Can’t wait to locate an up sized tank for my 04 R1200gs